One of the most interesting novelties of the future macOS Ventura and iOS 16 is called Continuity Camera. It consists of the possibility of using the iPhone (XR model and later) as a webcam for the Mac. Just that the two devices are connected to the same network, they are set with the same Apple account and with Bluetooth enabled. The Mac will allow you to automatically choose it as a video source from the various apps such as Skype, Zoom, etc.
In any case, there is no need to wait for macOS Ventura and iOS 16 to already have a functionality similar to Continuity Camera. A third-party app called Camo already allows you to use the front camera of the iPhone as a webcam for Mac and PC.
Camo supports a wide range of devices, including iPhones that will not be able to be exploited with Continuity Camera because it will not be possible to install iOS 16 on these models. Camo is compatible with any Mac from 2010 and later, macOS High Sierra and later, and also PCs with Windows.
How to turn iPhone into webcam for Mac
- Download the Camo app for iPhone or iPad (download from here and requires iOS 12 / iPadOS 12 or later.
- Choose “Continue” and approve access to the camera and microphone
- Download the Camo app on your Mac or PC and follow the on-screen instructions.
The Mac app can be downloaded from this address :
After downloading and unpacking the file with the Mac application, just copy it to the Applications folder and start it. Allow the installation of the video plugin and the audio plug-in.
At this point it is necessary to complete the installation, approving the extension by:
- Opening the System Preferences,
- Selecting “Security and Privacy”
- From the “General” section, unlock the padlock (to allow changes)
- Choose “Allow”.
You can now connect the iPhone to the Mac (using a USB-C to Lightning or USB to Lightning cable), and authorize the Mac access to the phone.
How to take advantage of Camo for iPhone
- After installing “Camo Studio” on the Mac, connect the iPhone to the Mac using the USB-C to Lightning cable or the USB to Lightning cable.
- Launch the Camo app on the iPhone
- Start any application on the Mac that requires the webcam (eg Skype). In the webcam selection settings, select “Camo Camera” as the capture device.
- From now on, the application you use will use the last selected webcam.
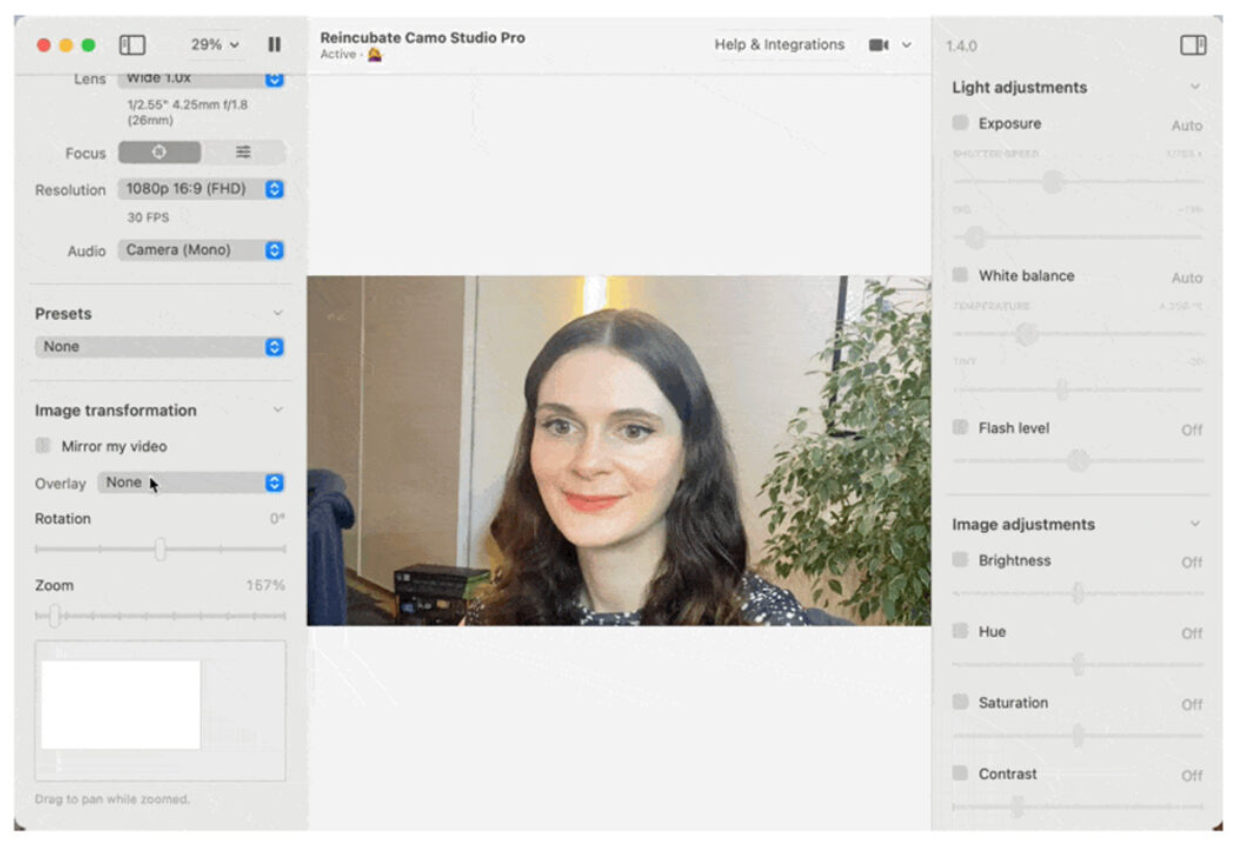
From the Camo Studio app for Mac, you can:
- Choose modes (vertical or horizontal), lens, resolution,
- Adjust the light and the image in various ways,
- Indicate overlay effects (e.g. a logo or writing), rotation, zoom, etc.
The Camo Studio app is free but you can take advantage of an even more advanced paid version (12 months or lifetime license) with features that allow you to remove the Camo watermark, stream at very high resolution, pan and zoom, switch between multiple iOS devices, use advanced editing and filters, etc.
How to uninstall the Camo Studio app on Mac
If for some reason you need to uninstall the Camo Studio app for Mac:
- You have to start this app,
- Select “Advanced” from the “Camo Studio” menu
- From here, “Uninstall Camo Studio”
- Confirm the deletion indicating the password administrator user,
- In the end, you can delete the app by dragging it to the trash, with the security of having uninstalled it correctly.

