If you are a webmaster of a WordPress site, I imagine that you were or might be in a situation where you would have to switch from one domain name (NDD) to another without changing the content of the site itself.
This can happen if you change the brand of your website to another name or if you simply change the domain extension, say from .net to .co.uk, to localize your website for your target audience.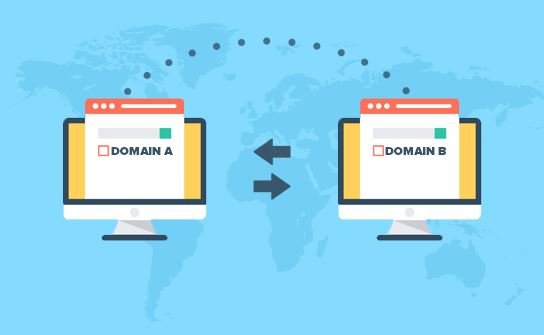
WordPress domain name change
Changing the domain name of a WordPress site is easy and shouldn’t take a long time if done correctly. However, if you are not careful during this process, you may end up making your site inaccessible. This is why it is good to make a full backup of your files and database before making any major changes.
Now let’s start the steps of changing the domain name of your WordPress site!
1. Make a full backup of your website
This process depends on your hosting environment and the control panel being used, but the steps are generally the same.
You just need to go to the backup section of your control panel and generate a full backup of your site (including database) and download it to your computer for added security.
2. Buy a new domain name
First of all, order a new domain name if you haven’t already done that. That’s obviously the most important element for this tutorial. You can use a domain finder tool to help you find an available domain name. The domain must be registered, and its DNS must already point to your hosting server.
Your website may be inaccessible under the new domain name even if you follow the steps in this tutorial correctly if the domain is newly purchased, as DNS propagation takes a few hours and can even go for up to 48 hours in some cases. However, DNS propagation time is typically around 1 to 2 hours.
3. Change the website URL from your WordPress dashboard
Now you need to change your domain name on the settings page of your WordPress site. To do this, head straight to the WordPress dashboard and choose from the Settings -> General sidebar. Then replace the old domain name with the new one as shown in the screenshot below: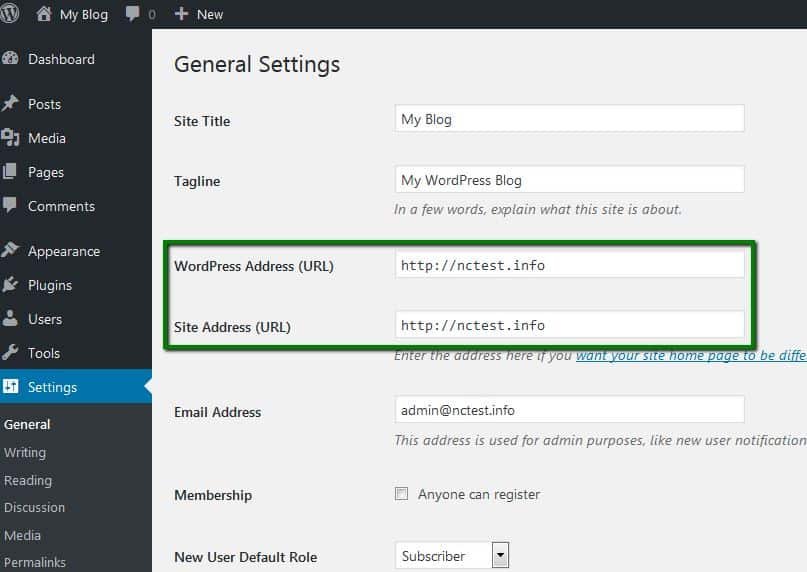
Once you’re done, be sure to click on the Save button.
The work is not yet finished. Before you can access your site again from the new address, complete the following steps.
4. Edit the wp-config.php file
Now you need to edit the wp-config.php file and add the new domain name to it. You can edit the file from your control panel’s file manager or by using an FTP client such as FileZilla. For this example, we’ll use FileZilla:
- Open the FileZilla FTP client.
- Connect to your server using your FTP details.
- Assuming you’ve installed WordPress in your root folder, locate the wp-config.php file in the public_html folder.
- Right-click on the wp-config.php file and select Edit.
- In the following code snippet, replace newdomain.net (example) with your new domain name, then insert the code into the wp-config.php file.
- Finally, save the file and upload it again to your server to replace the existing file.
5. Modify your database
The next step is to change the domain name in the database. We will apply the changes to the database using phpMyAdmin :
- On your hosting control panel, navigate to phpMyAdmin (usually, it can be found directly in the control panel or sometimes in the Databases section ).
- Choose the database you used for your WordPress site.
- On the phpMyAdmin page, find the wp_options table.
- Double-click on the old domain name with your mouse to modify it and replace it with your new domain name on the siteurl and home lines.
- Once you’ve typed in the new domain name, you can simply click outside the field or press Enter on your keyboard to save.
6. Redirect the old WordPress domain to the new one
This step is a bit optional but highly recommended! You should also consider keeping your old domain active temporarily to allow users to find you if they are unaware of the domain change on your website and also to ensure that search engines recognize the redirect to your new one.
This is an important step because it will help you maintain Google PageRank for your site, and your SEO work will not go to waste. To do this, we’ll do a 301 redirect from the old domain to the new one.
The 301 redirect can be created using the .htaccess file, which we can modify in the same way as we did with the config file:
- Open the FileZilla FTP client .
- Connect to your server using your FTP details.
- Look for the .htaccess file in the public_html folder.
- Right-click on the wp-config.php file and select Edit.
- Insert the following code after replacing newdomain.net with your new domain.
- Save the file and upload it again to your server to replace the existing file.
- #Options + FollowSymLinks
- RewriteEngine on
- RewriteRule ^ ( . * ) $ Http : //newdomain.net/$1 [R = 301, L]
Conclusion
There are many reasons behind changing the domain of a WordPress website, but luckily it’s an easy task that you can do in just a few minutes.
Here is a brief reminder of the steps to follow:
- Buy a new domain name.
- Change your website address in your WordPress settings.
- Update the wp-config.php file to set the new site and homepage URL.
- Update the site database and replace the old domain name with the new one.
- Add a 301 redirect to .htaccess file to redirect visitors and maintain your SEO.
That’s all! We hope you found this tutorial useful. Watch the video below for a detailed guide:
