Your Mac is starting to have some minor problems, and you have decided to restore it, but you want to make a system backup first? Or maybe, you are thinking of replacing the old hard drive, but you don’t want to lose the data inside it, so you have decided to make a backup with Time Machine, but you don’t know how to do it? You are in the right place.
In this guide, in fact, I will show you in detail all the procedures to be carried out to make a backup with Time Machine. Moreover, I will explain how to exclude certain files or folders from the Mac backup, restore the Mac backup, and finally restore only a file or folder from the backup created earlier.
To back up your Mac, you won’t have to download any third-party apps. Just use Time Machine. The latter is present by default on macOS. Although it is a very powerful application, its use is really simple. So all you have to do is equip yourself with an external hard drive or a rather large USB stick and continue reading the next paragraphs of this article.
Time Machine Backup Preparations
As previously written, to back up your Mac with Time Machine, you must have a very large pendrive or, better yet, an external hard drive, which has dimensions equal to or larger than the hard disk on your Mac.
Generally, it is recommended to use an external hard drive with double the disk capacity of the Mac. This way, you will save more backup copies, and you will not need to delete older backups in the future.
The storage drive you will use to back up macOS will need to be formatted using the Mac OS extended (journaled) file system. To format the external hard drive with Mac:
- Connect the external hard drive to the Mac;
- Press the keys CMD + SPACE from the keyboard, then type “Disk Utility” and press ENTER (alternatively, click on the “Launchpad” icon, click on the “Other” folder and then click on the “Disk Utility” icon ;
- From the left side menu, select the hard disk to format;
- Click on the “Initialize” button :
- In the “Format” field, select the item “Mac OS extended (journaled)” ;
- Type the name to assign to the hard disk (e.g., Backup Time Machine);
- Click on the “Initialize” button and then on “Finish.”
At this point, macOS will delete any files present on the external hard drive and recreate the file system. The whole process will be pretty quick, and once it’s done, you can back up your Mac.
How to back up with Time Machine
After formatting the external hard drive, you are ready to back up via Time Machine.
Connect the external hard drive you want to use to your Mac. After a few moments, a new window will appear, from which you will have the possibility to choose between three different options:
- Decide later: this option allows you to postpone the choice on how to use the external hard disk the next time you connect the USB drive;
- Do not use: by selecting this item, the USB drive can be used as a classic external hard drive, so you can copy, move and delete the files you want;
- Use as a backup disk: This is the option to select if you want to use the external hard disk as a backup disk with Time Machine.

Warning: write down the password somewhere and keep it carefully, since, without it, you will not be able to restore the backup made.
The procedure is complete, simple right? Time Machine will back up the system every time you connect the external hard drive to the Mac. Always leaving the external hard drive connected to the Mac, the application will constantly copy files, folders, data, and settings. In this way, you will always have a backup updated. Alternatively, you can choose to connect the external drive only when you want to make a backup. Even in this case, the backup procedure will be completely automatic.
Time Machine will perform intelligent backups, which means that it will not always create new backup files but will update and add only the necessary data.
If, after connecting the external hard drive to the Mac, the window that allows you to choose how to use the USB drive does not appear, here is what you need to do:
- Access the macOS “Settings” by clicking on the gear-shaped icon in the Dock bar;
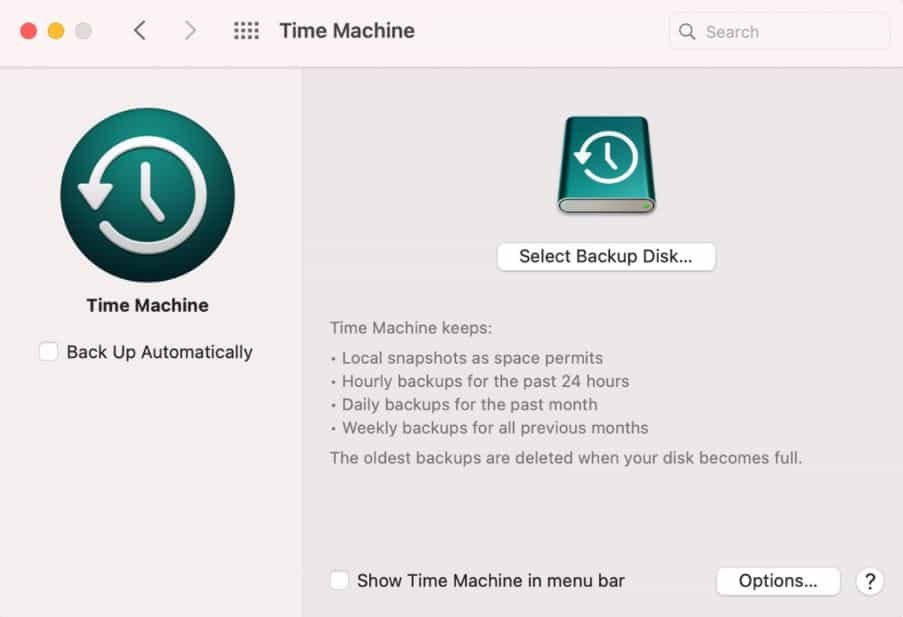
- Click on the “Time Machine” icon ;
- Click on the “Select backup disk” button ;
- Select the disk you want to use to backup, then click the “Use disk” button.
How to exclude file or folder from Mac Backup
After enabling Time Machine backup, through the procedure seen above, you will have at any time the possibility to exclude certain files or folders from the Mac backup. To do it:
- Click on the “Time Machine” icon present at the top right of the menu bar;
- Select the item “Open Time Machine preferences” ;
- Click on the “Options” tab ;
- Click on the small “+” button ;
At this point, you have to locate the files or folders you want to exclude from the backup, select them, and finally click on the “Save” button.
At any time, following the same procedure, you can re-include previously excluded files and folders. If you can’t see the Time Machine icon in the menu bar:
- Open the “System Preferences” ;
- Click on the “Time Machine” icon ;
- Put the checkmark next to “Show Time Machine in the menu bar”.
How to restore a Backup with Time Machine
Backups made through Time Machine can be easily restored at any time. For example, in case of serious macOS stability problems, you can decide to restore the whole system, or if you just want to recover a deleted file, you can backup a single file or folder.
These are two different procedures, but both very simple and fast. I’ll explain everything to you in the next paragraphs.
How to restore Mac via Time Machine Backup
If you have problems with your Mac and decide to restore the entire system from the backup made previously with Time Machine, the procedure to be performed is the following:
- Turn off the Mac (click on the apple-shaped icon in the top left of the menu bar and then click on the “Turn off” item );
- Turn on the Mac and hold down the CMD + R keys on the keyboard until the apple logo appears on the screen;
- After a few moments, the recovery mode screen will appear, click on “Use English as the main language” ;
- Click on the arrow at the bottom to continue with the restore;
- If you haven’t already, connect the external hard drive that contains the Mac backup;
- Click on the item “Restore from Time Machine backup” ;
- Click on “Continue” and then click on “Continue” again ;
- Locate and select the disk that contains the backup you want to restore, then click on “Continue” ;
- Select the date of the backup you want to restore and click on “Continue” ;
- Select your Mac’s internal drive;
- Click on “Unlock” and then type in the system password (the one you use to unlock your Mac);
- Click the “Restore” button to start the Mac backup restore process.
The time required to restore the backup varies depending on the size of the backup. So, after clicking on the “Restore” button, you just have to arm yourself with patience and wait for the process to complete.
How to restore individual files or folders from Time Machine backup
As previously written, you can decide to restore only individual files or folders from the Time Machine backup. Also, in this case, the procedure is really very simple and fast. Here is all you need to do:
- Open the “Finder” (the smiling face icon on the Dock bar);
- Go to the location where the files or folders you want to restore were present;
- Click on the Time Machine icon at the top right of the menu bar;
- Select the item “Enter Time Machine” ;
- Alternatively, after opening the “Finder,” click on the “Applications” item in the left menu and then click on the “Time Machine” icon.
At this point, the screen with the folder you have opened in the center will be displayed. Using the time bar next to the recovery screen, you can choose the backup to use. Then all you have to do is locate the file or folder you want to restore, right-click on it and select “Restore [file or folder name]”.
Conclusion
Now you know perfectly well how to backup with Time Machine, how to restore the system from the previous backup and how to restore individual files or folders.
As you have surely noticed these are rather simple procedures, so I am sure that after reading this article you will be perfectly able to carry out all the operations described successfully. However, if you encounter any problems while creating or restoring the backup on your Mac, remember that you can contact us at any time by writing a comment below or via the “Contacts” section.
I also remind you that Apple customer support is always at your disposal. You can contact an Apple operator by accessing this page. You will see that he will be able to solve the problem in no time.
